A small footprint, great benefits, and most importantly a healthy source of meat only feet from your kitchen! This is how we implemented meat rabbits in a small backyard homestead.
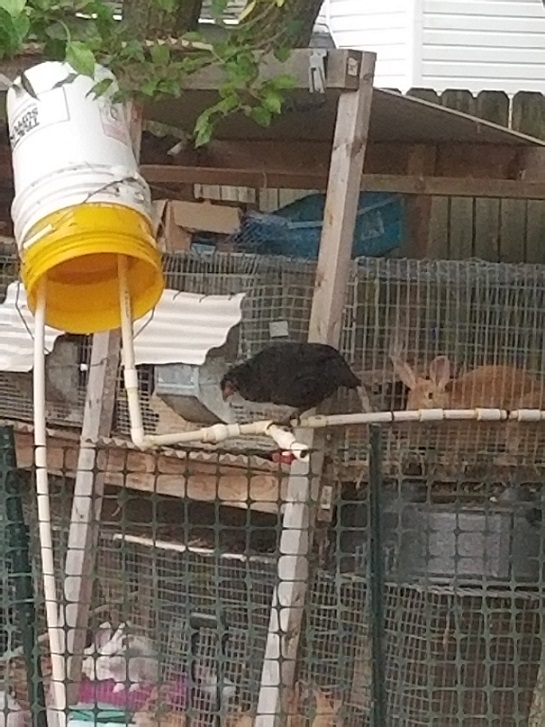
The main go to for starting homesteaders is meat chickens in a mobile chicken tractor. Or in our case we let them run around in our backyard. Read more about our backyard chickens and duck free range attempts here. Even after meeting with animal control there was one homesteading animal we were able to keep because it did not fall under keeping “fowl at large” in our city. Rabbits!
Our homestead has grown and so has our direction. As of writing this we have processed over 50 meat chickens, 10 quail and around 10 ducks. We have turkeys on the horizon and have considered adding meat rabbits back to our system. By far the majority of meat on our tables over the past few years has been rabbit.
Healthy food is expensive: Benefit of meat rabbits
Good quality meat is expensive. Good quality food is expensive! Hence we started looking at doing it ourselves. If you can find rabbit at a butcher or in a store, be prepared for a price! I have seen rabbit from 9 to 13 dollars a pound in stores!
In an urban homestead setting, the limiting factor is space! Rabbits are small and do not require a large footprint. This automatically gives them a leg up on other meat options we often see, chickens and pigs.
Rabbit meat is extremely low in cholesterol. This was a major benefit for me because I had high cholesterol and was on medicine for years! Rabbit meat was an option for me to still eat larger amounts of meat while also not bringing my cholesterol to a point the Doctors were writing prescriptions. See other approaches to our holistic lifestyle here.
Housing
Just like the low initial cost in meat chicken housing, rabbits also have a low entry cost. In our case we purchased a used run and a breeding trio from someone getting out of rabbit farming. I later bought wire fence, wire cage crimps and the pliers to make my own run at about $50.
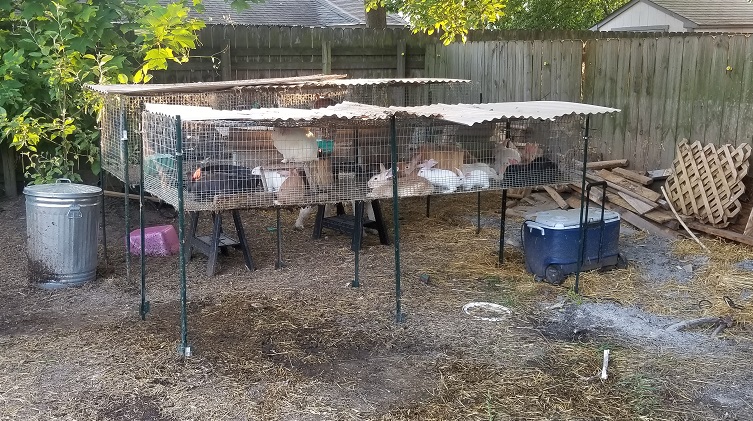
To support the cages we used T post and pipe clamps! For a sheltered area from the rain we ziptied some corrugated plastic sheets on one end. There are more build options and lessons learned. This was not our initial design but it is the system we now recommend!
The initial double stacked system for an even smaller footprint…not well liked. A wood floor enclosed hutch area, also poor results. Anything that can hold poop, pee and water invites stink! Anything that lets it fall where you can mix it in with hay or wood chips, GREAT! You can find a whole post on smell management here.
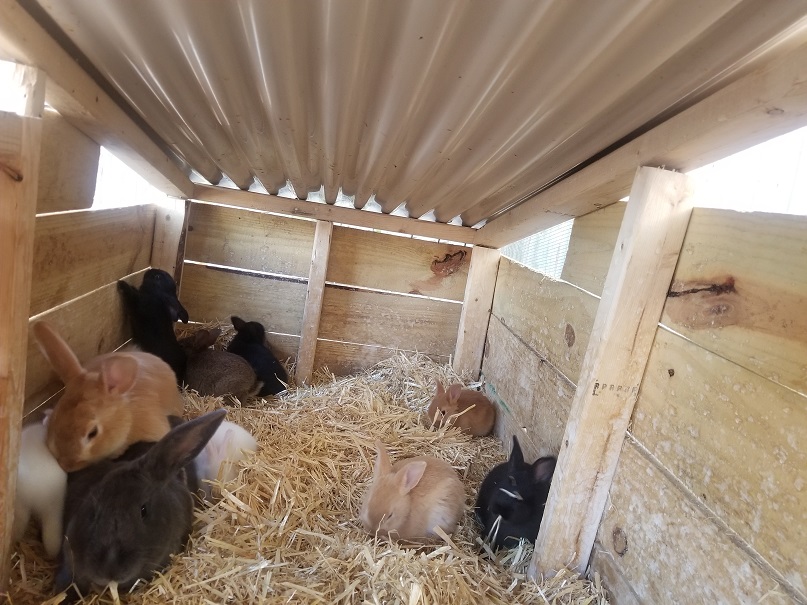
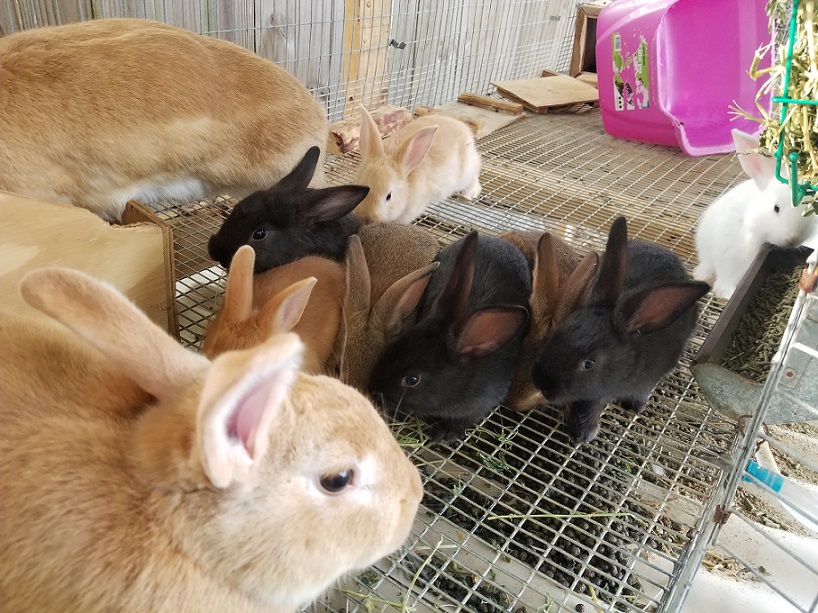
Most common set ups divide the rabbits into individual sections within the runs. You provide water and food to each section and manage the breeding. So we of course did not do that because that sounds time consuming. I in fact removed the walls dividing the initial run into 3 separate cages making a long community cage.
Our rabbits were community raised. At first this meant keeping clean nesting boxes available and ultimately no real expected schedule for due dates. Not really an issue for the small scale rabbit trio we were using. We did refine this process to give us a slightly more set schedule while also not adding much extra work.
Breeding Rotation
Initially we kept the buck with 2 does and they just did their thing. We found the moms would wind up pregnant right after giving birth and kits were being injured by a crazy buck trying to get to the doe. I had read about this as a possible outcome yet had not fully built the grow out cage yet.
Occasionally we would catch the mom starting to pull fur to make a nest and everything went smooth!
I admittedly poorly implemented the grow out cage, in that I only put the older kits down there once weaned and the moms proceeded to get pregnant again, and again. Until I tore down this first poor designed housing system to create the side by side!
A 3 month rotation with 2 does and 1 buck using 2 cages. The difficulty was in setting the first rotation. Cage A has a doe and her newborn kits. Cage B is a different doe and the buck. She is now 4 weeks from giving birth if they have done their duty.
The kits in cage A are out of the nest box and moving around. As the Doe in cage B builds her nest we would catch the Buck and move him to Cage A with the doe and now 4 week old kits. Those kits have started to wean and are eating solid food already. Initiate 1 month timer for the Doe in cage A.
As the doe in Cage A starts to get her nest ready it is time to repeat the Buck move and process the older kits in Cage A, now at 8+ weeks old. What we found was the does were not becoming immediately pregnant. It would be a week or more before the 1 month time frame would start. This gave us 10 to 12 week old kits for processing and worked extremely well for us. Less processing and movement days during the year.
The difference from this rotation and the industry standard is time the buck remains with the does and kits, Instead of a breeding event and then individual houses, ours still lived together.
Daily requirement: (water systems)
Water and food!
I never used the standard rabbit bottle waters! We live in Virginia, not the coldest area but we hit freezing temperatures during the winter. Changing out bottles in the winter every day seemed like more work than I was willing to dive into.
Watering system that pseudo worked:
Round 1 was a simple 5 gallon bucket hung on the cage frame with Tygon tubing, t-fittings, and plastic nipples.

This worked decently during the summer. The nipples were cheap and would leak frequently adding water to fallen poop and creating amazing stink. Read about our fight with smell!
The t-fittings were also prone to crack every few months requiring additional maintenance.
I added a second 5 gallon bucket to have additional water available and minimize filling at one point. As winter approached and the maintenance of this watering system kept increasing we decided on a more robust approach.
Pond pump!
A shift to PVC pipe, and a pond pump with 4 foot pump head. This allowed the water reservoir to remain on the ground and have a submersible water heater. Our water nipples were also upgraded to brass and screwed into pvc pipe fittings. I will add links to some of the products if we get Amazon affiliated in the future. PVC t-fittings and the brass nipples were purchased on Amazon with a quick search.
The first water reservoir in use was an old large camping cooler! It worked well but I cut an opening on the lid exposing some of the foam insulation which the chickens and ducks were trying to eat.
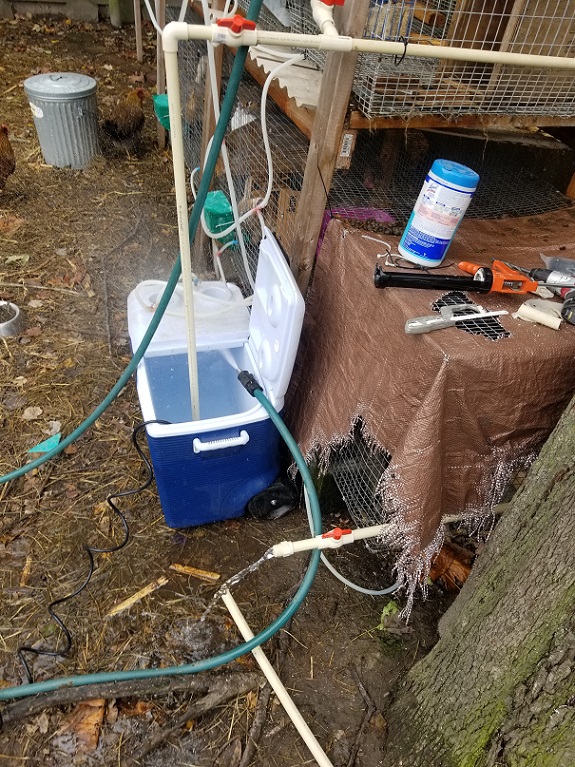
Increase holding capacity….50 gallon rain barrel! This system stayed in use till we moved, and I still have many of the pieces for future use.
Issues and challenges: Leaves in the tanks clogging the pump inlet. This was not much of an issue in the summer, but always would happen in the fall resulting in a full arm dip in decently cold water! A strainer on the access hole fixed this problem. We actually used a cut up queen excluder that was about 10 dollars on amazon!
Pipe flow. This created many headaches but was minimal work most days. The challenge was greater for our double stack cage lay out vice the side by side. The top nipples would not always have a full pipe of water based on the height, speed of the water, and pipe diameter. The bottom pipe generally was always full resulting in a constant leak from the nipples. The return to the reservoir was another challenge created by the stacked cage system which I do not recommend.
Solution: experiment and do not glue anything together until you have confirmed good functioning flow! For the stacked solution (which I really do not recommend) I used a super loop. I pumped the water to the pump head point and then brought the water back to the nipple height. This slowed the water speed and allowed enough water to be in the pipe for the nipples to work. A potentially easier solution requiring less PVC pipe manipulation is a ball valve.
Our side by side cage set up was much easier for setting up this water system. We placed the cages higher than the 50 gallon rain barrel allowing the nipples to be placed on the return line heading back to the barrel. Our main line went straight up, branched into 3 directions. 2 legs going parallel to the ground before bending down using 90 degree elbows and creating the water nipple return lines. The 3rd line was straight up, with a pipe rising higher than the pump head ability of the pump. This provided a venting action and also ensured both lines had adequate water in the lines. We placed ball valves on both return lines allowing us to isolate a loop if needed.
I unfortunately was not planning on blogging when all this experience occurred. Which results in few pictures!
Time
We discussed most of the details above on each major item (short of processing). I break this down to a 5 or 10 minute daily requirement. Weekends brought about 30 min of cleaning or mucking under the stacked system though with side by side runs I would move manure maybe once a month. And butchering…that varied by experience. Our first rabbits took around 20 minutes each, by a year later we were under 10 minutes a rabbit. 2 years experience and 5 minutes a rabbit was the norm.
Kits and age
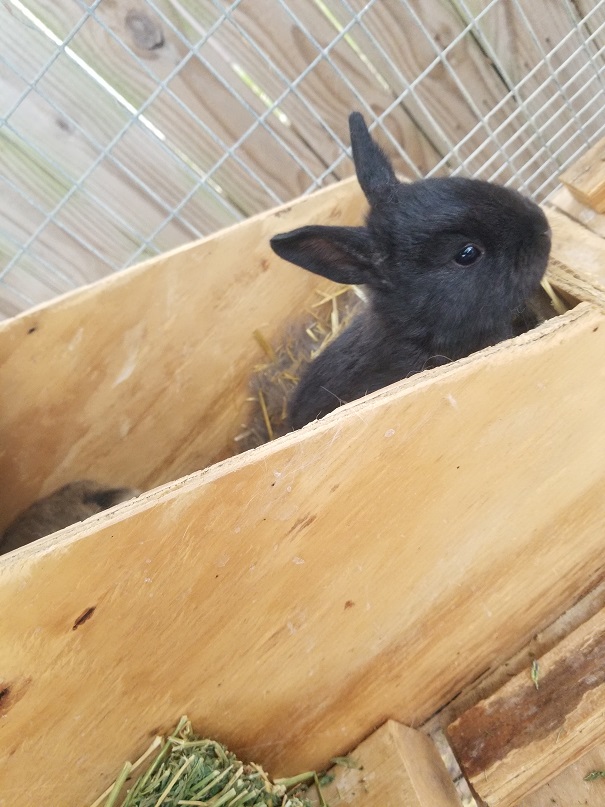
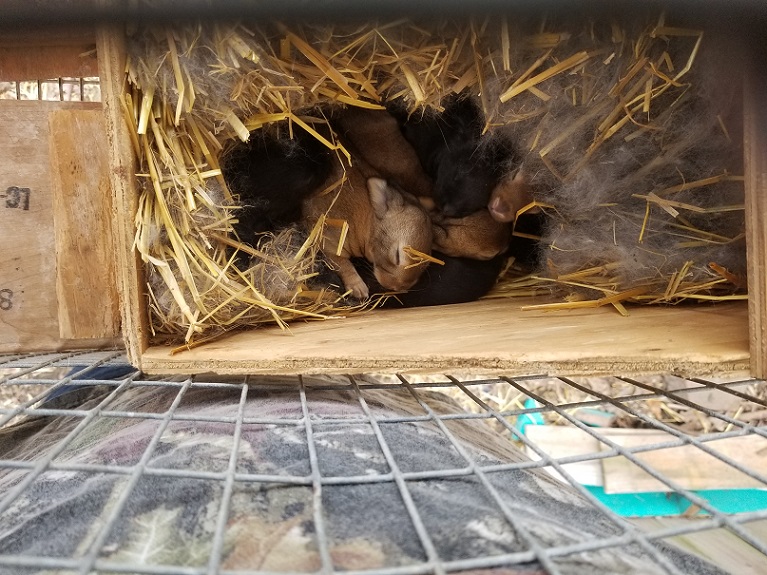
We had litters as large at 12 and as small as 3. The variation was great but our moms were great. Considerations are how many nipples a doe has and how many can she actually raise. The answer is 8 and the general wisdom is reduce the number of kits to match that number. This means fostering the other kits to a different mom with a smaller litter, or culling. We were not able to bring ourselves to this action and allowed our mom to handle the excess. Yes there was the occasional runt out of the group however our moms would often raise more than 8 kits with no issues!
At about 10 days of age the kits will open their eyes. Before then it is important to check on the nest more often. This does not mean to go lift the fur and straw the mother used to cover her young! The kits do however get more mobile and will either get separated from the rest of the kits or perhaps fall out of the nest box requiring our intervention putting them back.
We unfortunately lost more than 1 kit to them wandering away from the pack. The Doe would often be with the kits at night, would be wandering during the day and we would check once or twice if able and before sundown would do a final assist if needed.
Outcome!
Hundreds of pounds of healthy meat raised in your backyard. 10 rabbits processed at 12 weeks would dress out at an average of 3lbs each for a total of 30lbs. Rabbit around our part of Virginia was going for $10 dollars a pound (average) for a total of $300 of meat each month. Our cost was some time and a few bags of rabbit feed, ringing up to maybe $45 dollars a month. An extreme victory for a small backyard homestead!