
One of the biggest challenges working with rabbits in cages is water. Especially if your cages are outside and you experience freezing temperatures. Or if you are away from home for a couple days and want to ensure enough water is available. Which rabbit water system do you pick? There are only so many hours in a day and finding the most efficient approach to watering your rabbits is helpful in freeing up some of that time!
If you are new to our site, welcome and feel free to check out our story page. We are building up homesteading and healthy living pages to assist people in their own journey. I raised meat rabbits for a few years in our small backyard homestead while my wife and I both had full time jobs in the military. Time available and efficiency of the chores are critical! We have since moved and the family has grown with rabbits currently not on the homestead. These lessons were learned the hard way and I hope to answer some questions I have received over the years.
I have no affiliation and all links are just for helping to the same or similar products I used. This website receives no endorsements or payment
Common Rabbit Water System
Rabbit Water Bottles
From the aisle at our local farm supply stores, bottles are the most common option for rabbit cages. Most set ups come with a quick connection that allows the nipple to be inserted through the cage and held in place. Simple, minimal set up, and easy to use for a single rabbit and where it does not freeze. An even cheaper option is where you get the drinking attachment and can reuse a soda bottle. We are all for repurposing!
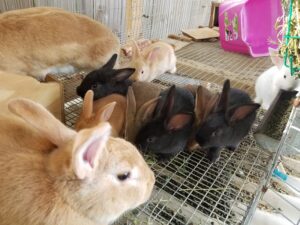
I raised our rabbits in a community set up. Multiple rabbits in each cage rotating the dad. Check out more on how we made this system work! For use in my system I would have used 3 or 4 bottles in each of my community cages. For quick filling of the bottles to save chores time a full 5 gallon bucket, submerging each bottle to rapidly fill and replace the bottle.
Being a cheaper drinking system with the recycled soda bottles, a spare set of bottles can also be filled inside the house and brought outside to swap into place. Low cost and the efficiency of a 5 gal bucket fill makes this rabbit water system tempting.
I recently added two nipple style chick drinkers to a poultry brooder that can be filled from the top. The drinkers were relatively cheap from Premier 1 and could be another option for easier filling if the rabbits can figure out how to use them. I included a link if someone is willing to try! Please leave a comment if it works.
Bottle Negatives
There are some downsides of this option for homestead meat rabbit operations. As discussed in our post on rabbits, we used a community system rotating the buck between two cages. The young were grown out with their moms placing upwards of 8 to 9 rabbits in the run at a time. This would require multiple bottles to be used to support all those rabbits. Each one being unhooked, unscrewed, filled and replaced did not sound like fun to us so we quickly discarded our single bottle before our first babies were born.
Freezing temperatures is the next huge dilemma we had with the rabbits. We have mastered the art of keeping our water from freezing for our poultry. Rabbits would take a couple years and multiple rabbit water system designs to uncover.
There are heated bottles that can be purchased and plugged in to maintain unfrozen water. I have not tried these as the investment at 20 dollars a bottle was high given the amount of work. If you are running a small operation and not trying to plug in multiple bottles this rabbit water system may be for you.
Bowls
When my elaborate watering systems had issues or failed on me I resorted to some heavy dishes. I cannot leave this out as an option and always an item to use in a pinch! Think something larger, not super deep, and cheaply purchased at a thrift store! The reason for wider base and being heavier was to minimize the chance of rabbits flipping them. I tried black rubber dish from Tractor Supply; however, the rabbits chewed the edges up.
We found all the downsides in various bowls. Go light and it will be flipped. Too large and you just gave at least 1 rabbit a private pool to cool off in! The most annoying, poop in the water bowl! This did lead to more frequent cleaning and extra work. Not an efficient time saving rabbit water system!
The Fancy Rabbit Water System
5 gal with tubing and drinking nipples
I saw some pictures of awesome watering systems that can be made for super cheap with the help of tygon tubes, a couple T connectors and rabbit drinking nipples. All of this was purchased for very little from Amazon and delivered to my door. I grabbed a couple barred connection for the tubing to attach into a 5 gallon bucket and let gravity do the work. My buckets are hanging from a garage organizer for shovels (needs to be able to support 40 pounds of weight if hanging 5 gallons of water).
To keep the tubing tidy I used every zipties. Great for bringing everything into place and very seldom did my rabbits chew through any of the zip ties.
5 Gal Bucket Problems!
I cannot say the same thing for my hose. The rabbits did chew through my hose on multiple occassions which drained the whole bucket since it was a gravity system. 5 gallons of water on the ground mixed with poop created a wonderful smell that nobody appreciated. We figured out how to work with poop and management the hard way and wrote all about those experiences here.
The leaks were not all rabbit induced. Those cheap T connections were prone to fail and caused more than one headache. Based on the faded color of the T connections I believe the failure was a result of weather exposure. The most reliable part of my 5 gallon water system seemed to be the drinking nipples!
Luckily for me this occurred during the summer and before I had to address freezing temperatures. I did not have a solution yet for the winter months and my gravity water system! Hopefully you read this before you invest in a gravity rabbit water system or you live in a warmer environment. Maybe you living in a freezing area but have the rabbits in a shed or similar space above freezing. This gravity system could work well once the sun and weather exposure is removed!
Plumb the whole water system with a pump!
I have a slight engineering background and my wife did not miss the opportunity to comment on my nerd excitement for this project! Admittedly this was a large level of trial and error. I will try to assist in some of the rough measurements and plans I used to minimize your own number of prototypes. Some of my main parts for this water were a pond pump (I picked one with a 4ft capacity) loads of PVC pipe, brass rabbit drinking nipples with the threaded pvc pipe inserts. Links included in bold.
Regretfully I was not even aware what a blog was or how to write one as we learned these lessons. My pictures are few and not extremely helpful but I am including the lessons and experience to hopefully spark your creative juices to experiment also!
Tank of water!
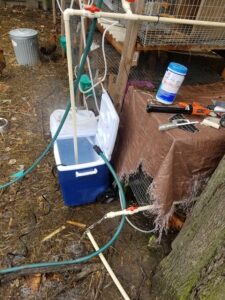
Our first version had a large old camping cooler which I cut to allow my heater, pvc pipe, and cables to run through. I thought the use of an old cooler was genius since it is insulated and would keep the water warmer with less electricity from my 80W heater during the winter. The cuts I made however exposed the foam insulation which became a pecking favorite of the chickens resulting in poop in the water and foam in my yard. Back to the drawing board on water tanks.
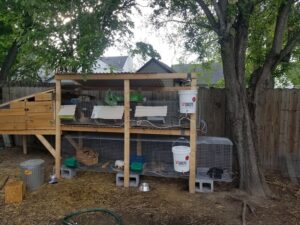
For the final approved design, a repurposed rain barrel which holds more water! I never ran empty during the summer and this rabbit water system was an all around time saver! It was not without issues though! My opening for the pump and heater was directly under our pear tree which had leaves fall in and clogged the pond pump suction. Not to horrible, except the pipe could not be lifted from the water so my arm had to go in…and the water is cold. If I had shorter arms I may have not been able to unclog the pump without removing my water loops. An extra queen excluder from our hives cut to cover the opening fixed most issues.
Fancy Rabbit Water System Issues and Solutions
The pond pump I purchased from our hardware store did not have an easy connection to the PVC pipe I was using. I sized my adaptors on the pump to fit the pumps barb connection then applied glue. This worked well and I still have the pump, with glued on pipe.
Cleaning the pump was always a challenge because I did not have an easy disconnect. I glued everything together. My only cleaning option was putting my long arm into the barrel of water…even if the winter. Fortunately the heater did keep the water above freezing! I would still glue the pump discharge to the pipe, however I would have a method of disconnecting the pipe and pump from the rest of the system.
The brass drinking nipples needed to be adjusted for the flow rate. I had two loops and did not understand this at first. 1 set of drinkers worked while the other did not until I adjusted the drinking nipples. If the nipples are too loose then a steady drip or even stream will come from them. Too tight will result in no water flowing though this could also be a lack of water pressure at the nipple. I had to ensure water was staying the the PVC pipe to apply pressure on the nipples.
Shutoff valves!
Place shut off valves on each loop you plumb. This allows a run no longer in use to be isolated or repairs to be done on that side without downing the whole system. I placed my right after the divider between my 2 loops.
Throttle valves
How do you ensure water is not flowing right past the drinking nipples? I briefly mentioned earlier this was an issue along with adjusting the nipples.
My solution was similar to the shut off valves. I placed the exact same PVC ball valves on the return lines to act as a throttle, slowing down water and forcing water to each of the nipples. Make sure the water is still flowing through your discharge and back into the rain barrel. Also any time the throttle valve is adjusted the nipples may also need adjusting. More pressure may cause unintended dripping, or less pressure and your rabbits will be without water. This rabbit water system required some tuning but was worth figuring out.
Burp valve and air binding
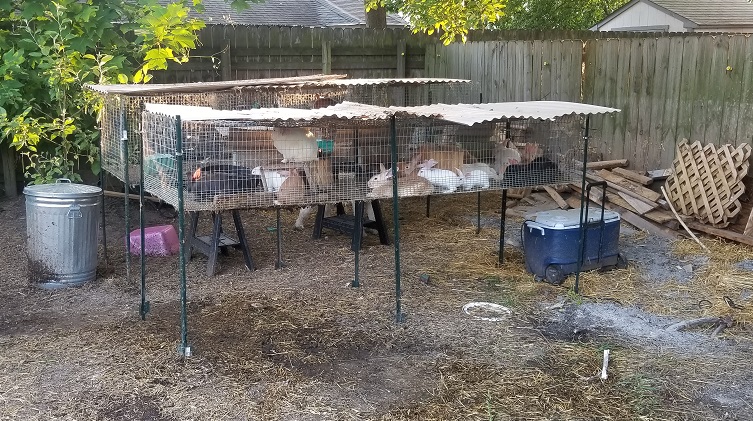
My two cages each had a loop with 3 or 4 drinking nipples. This totaled to 2 loops but I used a 4 way connection at the very top of my pump discharge which was just under 4 ft tall (I have a 4ft pump head pond pump). The top connector of the T went up another foot to allow for air to be discharged and not bind up one of my other loops.
All my drinking nipples were level with the discharge. The supply from the pump had no drinking nipples but just had water flowing horizontal and above the return line. This both slowed down the water and created a more consistent pressure on each of the nipples. If you have staked cages like I originally did, make a PVC pipe loop which then drops back to the water line. Sizing your pump right for pump head and height of your cages will be necessary.
Conclusion
Scale the time you put into your rabbit water system based on how big of an operation you are running. With two cages and anywhere from 3 to 18 rabbits at any given time the added effort developing a pump driven fancy rabbit water system with submersible heater for winter use was worth the time. Even the few headaches to solve the issues (my wife knows I enjoy solving problems) was worth the super efficient and time saving system.